Introduction
A homemade tank trap is a cost-effective defensive structure designed to stop or slow vehicles, typically built from wood, concrete, or steel using basic construction skills and readily available materials. Whether you need a barrier for private property, farm access control, emergency preparedness, or tactical training, building your own anti-vehicle obstacle can save thousands of dollars compared to commercial alternatives.
This comprehensive guide covers everything you need to know about creating a homemade tank trap — from materials selection and dimensions to step-by-step instructions, cost breakdowns, and legal considerations. We will explore multiple construction methods including DIY wood tank trap designs and concrete versions, provide detailed homemade tank trap plans, and answer all the common questions about materials, costs, and building techniques.
What Is a Homemade Tank Trap?

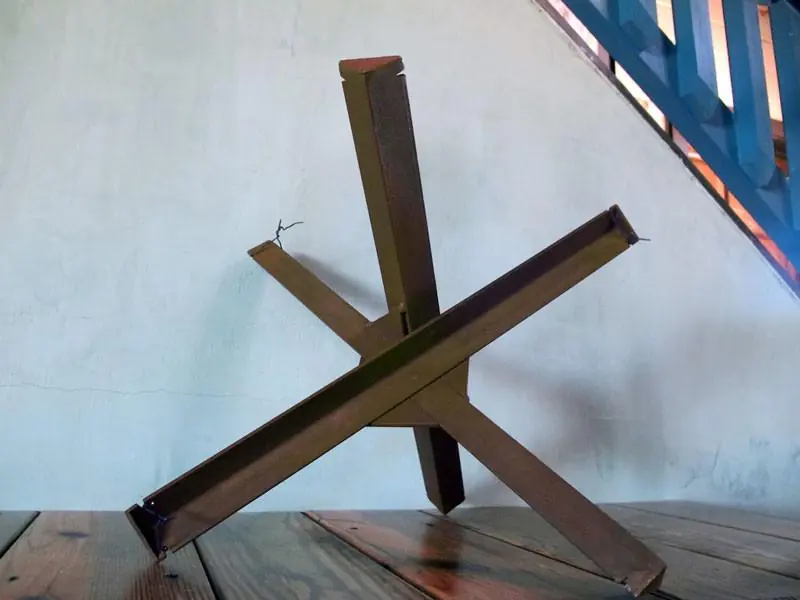
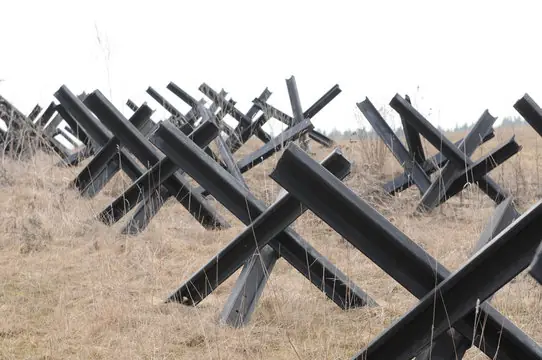
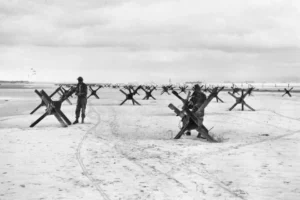
A tank trap, also known as a vehicle obstacle or anti-tank ditch, is a barrier designed to impede or prevent the movement of wheeled and tracked vehicles. Historically, tank traps were used extensively in military defense lines — from the Czech hedgehog anti-tank obstacles of World War II to concrete dragon's teeth used along the Siegfried Line. Modern homemade tank trap designs draw inspiration from these proven military concepts but are adapted for civilian applications using accessible materials and construction methods.
The basic principle is simple: create a structure that a vehicle cannot drive over, through, or around without sustaining damage. Effective tank traps exploit vehicle weaknesses — limited ground clearance, vulnerable suspension components, and the inability to climb steep or unstable surfaces. A well-built homemade tank trap will either stop a vehicle completely or force it to slow to a crawl, buying valuable time for security personnel.
Common civilian applications for homemade tank traps include:
- Perimeter security — protecting sensitive facilities, equipment yards, or construction sites
- Farm and ranch access control — preventing unauthorized vehicles from entering fields or livestock areas
- Emergency preparedness — creating barriers for disaster response or civil defense scenarios
- Tactical training — building realistic obstacles for security force training exercises
- Private property protection — securing remote cabins, workshops, or storage facilities
Homemade Tank Trap Materials
Selecting the right homemade tank trap materials is crucial for building a durable and effective barrier. The materials you choose will depend on your budget, required strength, and how long you need the barrier to last. Here is a comprehensive breakdown of the most common materials used for DIY vehicle obstacles:
Wood Materials for DIY Wood Tank Trap
| Material | Recommended Specification | Typical Cost | Durability |
|---|---|---|---|
| Pressure-treated lumber | 6x6 or 8x8 posts | $15-30 per 8-ft post | 3-5 years |
| Railroad ties | 7x9 in cross-section | $10-20 each used | 5-10 years |
| Hardwood logs | 8-12 in diameter | $0-10 each (if sourced locally) | 2-4 years |
| Plywood (for formwork) | 3/4 in exterior grade | $40-60 per sheet | Temporary (forms) |
Concrete and Steel Materials
- Ready-mix concrete — 3000-4000 PSI mix for poured barriers. Approximately $120-150 per cubic yard.
- Rebar reinforcement — #4 (1/2 in) or #5 (5/8 in) rebar for concrete reinforcement. $0.50-1.00 per linear foot.
- Steel beams or pipes — Used I-beams or heavy-wall pipe for permanent barriers. $1-3 per pound from scrap yards.
- Wire mesh — 6x6 W2.9/W2.9 welded wire fabric for concrete reinforcement.
The best homemade tank trap materials for most builders are pressure-treated 6x6 posts for wood designs, and 3000+ PSI concrete with rebar for permanent installations. Each material choice affects the overall project budget and should be evaluated against your specific security requirements.
Homemade Tank Trap Dimensions
Proper homemade tank trap dimensions are critical for effectiveness. A tank trap that is too small will simply be driven over, while one that is unnecessarily large wastes materials and labor. The following homemade tank trap dimensions are based on military anti-vehicle obstacle standards and real-world testing.
Minimum Effective Dimensions for Vehicle Stopping
| Vehicle Type | Minimum Height | Minimum Width | Depth/Base | Purpose |
|---|---|---|---|---|
| Passenger cars and SUVs | 24 in (60 cm) | 48 in (120 cm) | 36 in (90 cm) | Stop or disable suspension |
| Pickup trucks and vans | 30 in (75 cm) | 60 in (150 cm) | 42 in (105 cm) | Stop or high-center vehicle |
| Light military vehicles | 36 in (90 cm) | 72 in (180 cm) | 48 in (120 cm) | Stop wheeled tactical vehicles |
| Medium armor (APCs) | 48 in (120 cm) | 96 in (240 cm) | 60 in (150 cm) | Stop or disable tracked vehicles |
Design Considerations
When designing your barrier, consider these important factors:
- Approach angle — Vehicles can climb obstacles up to their approach angle (typically 25-40 degrees). Your barrier must be steeper than this.
- Ground anchoring — Wood and steel traps must be anchored to prevent being pushed aside. Use 3-4 ft deep post holes with concrete footings.
- Spacing — For multiple barriers, space them at intervals equal to 1.5 times the vehicle's wheelbase to prevent a single vehicle from straddling two barriers.
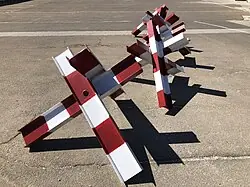
- Visibility — Paint barriers with high-visibility stripes or reflective markers to prevent accidental collisions, especially at night.
DIY Wood Tank Trap
Can you make a tank trap from wood? Yes, a DIY wood tank trap is one of the most practical and cost-effective options for property owners who need vehicle barriers. Wood tank traps are widely used on farms, rural properties, and tactical training ranges because they are quick to build, require minimal tools, and can be replaced easily when they wear out.
Materials for a Wood Tank Trap
For a standard DIY wood tank trap that can stop passenger vehicles and light trucks, you will need:
- Six 8-ft pressure-treated 6x6 posts — these form the main structure
- Two 8-ft pressure-treated 4x6 beams — for cross bracing and connection points
- Gravel or crushed stone — 1/2 cubic yard for drainage and anchoring
- Galvanized lag bolts and structural screws — 1/2 in diameter by 8 in length for joining posts
- Post-hole digger or auger — for excavating 3-4 ft deep post holes
Wood Trap Construction Steps
- Mark and dig post holes — Space three post holes across the barrier width (6-8 ft apart) at a 45-degree angle facing the approach direction. Each hole should be 12 in diameter and 3-4 ft deep.
- Set the posts — Place the 6x6 posts in the holes at a 45-degree angle pointing toward oncoming vehicles. Pour 6 in of gravel for drainage, then backfill with concrete or compacted soil.
- Install cross bracing — Connect the posts with 4x6 beams using galvanized lag bolts. This creates a rigid triangular structure that resists vehicle impact.
- Add secondary supports — For increased strength, add diagonal bracing between the main posts at midpoint height.
A well-built DIY wood tank trap will stop most civilian vehicles effectively. For heavy trucks or military vehicles, use 8x8 posts with closer spacing (4 ft between posts) and deeper footings.
How to Build a Homemade Tank Trap
Before starting construction, proper planning is essential. A successful homemade tank trap project requires three phases: site assessment, material procurement, and construction. Here are the step-by-step homemade tank trap instructions for a standard wood-based barrier, which is the most common DIY approach.
Phase 1: Site Assessment and Planning
- Identify the approach path — Determine where vehicles are most likely to approach. The barrier should be placed at least 30 ft before the asset you are protecting to provide a stopping zone.
- Check underground utilities — Call your local utility locating service before digging post holes.
- Measure and mark — Use spray paint to mark post hole locations. For a standard barrier, space holes 4-6 ft apart in a line perpendicular to the approach.
Phase 2: Material Procurement
| Item | Quantity | Estimated Cost |
|---|---|---|
| Pressure-treated 6x6 posts (8 ft) | 6 | $90-180 |
| Galvanized lag bolts (1/2 x 8 in) | 24 | $30-50 |
| Gravel (1/2 cubic yard) | 1 load | $20-40 |
| Concrete mix (80 lb bags) | 12 | $60-80 |
| Reflective paint or tape | 1 can/gallon | $15-25 |
Phase 3: Construction
- Dig post holes — 12 in wide, 3-4 ft deep using a post-hole digger or power auger. Angle each hole at 45 degrees facing the direction of vehicle approach.
- Add gravel base — Pour 6 in of gravel into each hole for drainage and frost protection.
- Set and align posts — Place the 6x6 posts in the holes at the correct angle. Use a level to ensure consistent alignment across all posts.
- Pour concrete — Mix and pour concrete around each post, checking alignment as you work. Allow 48 hours for concrete to cure.
- Attach cross members — Bolt 4x6 beams horizontally across the posts using galvanized lag bolts. Install one row at mid-height and another near the top.
- Apply visibility markings — Paint the top and approach-facing side with high-visibility yellow or orange stripes.
These homemade tank trap instructions produce a barrier that will stop standard vehicles up to 7,000 lbs. For heavier threats, upgrade to 8x8 posts with 6-ft deep footings and add steel cable reinforcement between posts.
Best Homemade Tank Trap Plans
Finding the right homemade tank trap plans is essential before breaking ground. The best plans match your specific security needs, available materials, and skill level. Here are three proven homemade tank trap plans arranged by complexity and cost.
Plan 1: Basic Single-Row Wood Barrier (Beginner)
Skill Level: Beginner | Cost: $200-350 | Time: 1-2 days
This is the simplest design — a row of 6x6 posts set at a 45-degree angle across the approach path. Best for light vehicle access control on farms and rural properties. Requires only basic tools: post-hole digger, level, saw, drill, and wrenches.
Plan 2: Reinforced A-Frame Barrier (Intermediate)
Skill Level: Intermediate | Cost: $400-700 | Time: 2-3 days
The A-frame design uses paired posts forming a triangular cross-section, creating a much stronger structure. Suitable for stopping pickup trucks and light commercial vehicles. Requires some carpentry experience and a helper for heavy lifting.
Plan 3: Concrete and Steel Hybrid Barrier (Advanced)
Skill Level: Advanced | Cost: $800-1,500 | Time: 4-7 days
This permanent design combines concrete footings with steel I-beam posts, offering the highest level of protection. Capable of stopping heavy trucks and off-road vehicles. Requires concrete experience and access to welding equipment or a steel fabricator.
Choosing the Right Plan
When reviewing homemade tank trap plans, consider these factors:
- Threat level — What size vehicles do you need to stop?
- Soil conditions — Sandy or wet soil requires deeper footings
- Local climate — Freeze-thaw cycles affect concrete and wood durability
- Maintenance capacity — Wood barriers need inspection and replacement every 3-5 years
How to Build a Concrete Tank Trap at Home
How to build a concrete tank trap at home? Concrete tank traps are the most durable option, lasting 20-30 years with minimal maintenance. While more labor-intensive than wood versions, a concrete barrier offers superior stopping power and virtually permanent protection. Here is how to build one.
Concrete Tank Trap Design Options
| Type | Description | Estimated Volume | Weight |
|---|---|---|---|
| Concrete post (6x6) | 8-ft tall reinforced post set 4 ft deep | 1.5 cubic ft each | ~450 lbs |
| Concrete block (2x2x4 ft) | Pre-cast barrier block placed in position | 16 cubic ft each | ~2,400 lbs |
| Poured wall section | Continuous wall 4 ft high, 2 ft thick | 8 cubic ft per linear ft | ~1,200 lbs per linear ft |
Construction Steps for Concrete Post Tank Trap
- Excavate holes — Dig post holes 12-16 in diameter and 4 ft deep, angled at 45 degrees toward the approach direction. Space holes 4-6 ft apart.
- Prepare rebar cage — Build a rebar cage using four #4 (1/2 in) vertical bars tied with #3 (3/8 in) horizontal ties at 12-in spacing. The cage should extend the full height of the post.
- Build forms — Construct plywood forms for the above-ground portion of each post. The forms should create a post cross-section of at least 6x6 in.
- Pour and vibrate concrete — Use 3500+ PSI concrete mix. Pour in layers and vibrate to eliminate air pockets. The below-grade portion does not need forms if the hole is clean and stable.
- Finish and cure — Screed the top surface and allow concrete to cure for at least 7 days before any load is applied. Keep the concrete moist during curing.
- Add connecting beams — For additional strength, pour reinforced concrete beams between posts after the posts have cured for 14 days.
A concrete homemade tank trap requires more upfront investment but offers the best long-term value. The typical homemade tank trap cost for a concrete version ranges from $800 to $2,000 depending on size and reinforcement requirements.
Homemade Tank Trap Cost
How much does it cost to build a homemade tank trap? The homemade tank trap cost varies significantly based on materials, size, and design complexity. Here is a detailed cost breakdown for the three most common build types:
Cost Comparison by Barrier Type
| Barrier Type | Materials Cost | Tools Required | Labor Time | Total Estimated Cost |
|---|---|---|---|---|
| Basic wood (6x6 posts) | $200-350 | Hand tools, drill | 1-2 days | $250-400 |
| Reinforced A-frame wood | $400-700 | Power tools, auger | 2-3 days | $500-800 |
| Concrete posts with rebar | $600-1,200 | Concrete mixer, forms | 4-7 days | $800-1,500 |
| Concrete wall with steel | $1,200-2,500 | Welder, concrete equipment | 5-10 days | $1,500-3,000 |
| Steel I-beam barrier | $800-2,000 | Welding equipment | 3-5 days | $1,000-2,500 |
Cost-Saving Tips
- Source used materials — Check Craigslist, Facebook Marketplace, and local construction surplus for used pressure-treated lumber, rebar, and steel beams. Savings of 30-50% are common.
- Use on-site materials — If you have hardwood trees on your property, cut and treat your own posts to eliminate lumber costs entirely.
- Mix your own concrete — Buying bagged concrete mix is more expensive than ordering a ready-mix truck for larger projects. For 3+ cubic yards, ready-mix is typically 20-30% cheaper.
- Combine with other projects — Build your vehicle barrier alongside other concrete projects (foundations, retaining walls) to share the cost of equipment rental and concrete delivery.
The homemade tank trap cost for a basic but effective wood barrier is approximately $250-400, making it accessible for most property owners. This is dramatically cheaper than commercial vehicle barriers, which typically start at $2,000-5,000 for equivalent protection.
Legal Considerations for Building a Homemade Tank Trap
What are the legal considerations for building a homemade tank trap? Before building any vehicle barrier on your property, it is essential to understand the legal implications. A barrier that causes injury or property damage can expose you to significant liability if not properly implemented.
Key Legal Factors
- Property lines — Your barrier must be entirely within your property boundaries. An anti-vehicle obstacle that extends onto public right-of-way or neighbor's land creates immediate legal exposure.
- Emergency access — Your barrier must not block access for emergency vehicles (fire, ambulance, police). Check local regulations regarding minimum access widths — typically 12-20 ft for emergency vehicles.
- Visibility and warning — In most jurisdictions, you are required to make visible obstructions obvious. Use reflective markings, warning signs, and lighting to prevent accidental collisions. Failure to warn may create liability if someone is injured.
- Local building codes — Some municipalities regulate the construction of fences, walls, and barriers. Check with your local building department before starting construction.
- Zoning restrictions — Agricultural, residential, and commercial zones may have different rules regarding security barriers. HOA covenants may also restrict barrier construction.
Liability Considerations
If someone is injured by your security barrier — whether an intruder or an innocent person who accidentally drives onto your property — you could face civil liability. Consult with an attorney in your jurisdiction to understand:
- Whether your state follows "attractive nuisance" doctrine (which could apply if children are drawn to climb on the barrier)
- The standard of care required for property security features in your jurisdiction
- Whether your liability insurance covers barriers and if additional coverage is needed
Best Practices for Legal Compliance
- Post clear warning signs — Install signs reading "Security Barrier Ahead" at least 50 ft before the obstacle.
- Use high-visibility markings — Paint barriers with alternating orange and white or yellow and black stripes.
- Install lighting — Solar-powered warning lights improve nighttime visibility.
- Maintain clear access for emergencies — Design your barrier with a removable section or gate for emergency vehicle access.
- Document everything — Photograph your barrier, warning signs, and markings. Keep records of permits and inspections.
Conclusion
Building a homemade tank trap is a practical and cost-effective way to enhance property security, control vehicle access, and prepare for emergency situations. Whether you choose a simple wood barrier for $250 or a permanent concrete installation for $1,500, the key to success is proper planning, quality materials, and attention to legal requirements.
Summary of key recommendations:
- Start with proven homemade tank trap plans that match your specific threat level and budget
- Use pressure-treated 6x6 lumber for wood barriers — it offers the best balance of cost, strength, and durability
- Set posts at a 45-degree angle with 3-4 ft deep concrete footings for maximum stopping power
- Follow the detailed homemade tank trap instructions provided in this guide for safe and effective construction
- Consider your material choices carefully — match them to the expected vehicle threat
- Review local regulations and consult an attorney before building permanent barriers
- Install warning signs and reflective markings to reduce liability risk
A well-designed vehicle barrier provides security and peace of mind at a fraction of the cost of commercial alternatives. With the information in this guide, you have everything you need to plan, build, and maintain an effective anti-vehicle obstacle for your property. For custom barrier solutions or commercial-grade options, contact our team for professional consultation.